Alright, time to post another speed doodle, I’ll keep these babies coming until I’m completely satisfied with my speed vs quality before moving on to make complete character projects with the new techniques I am developing for myself.
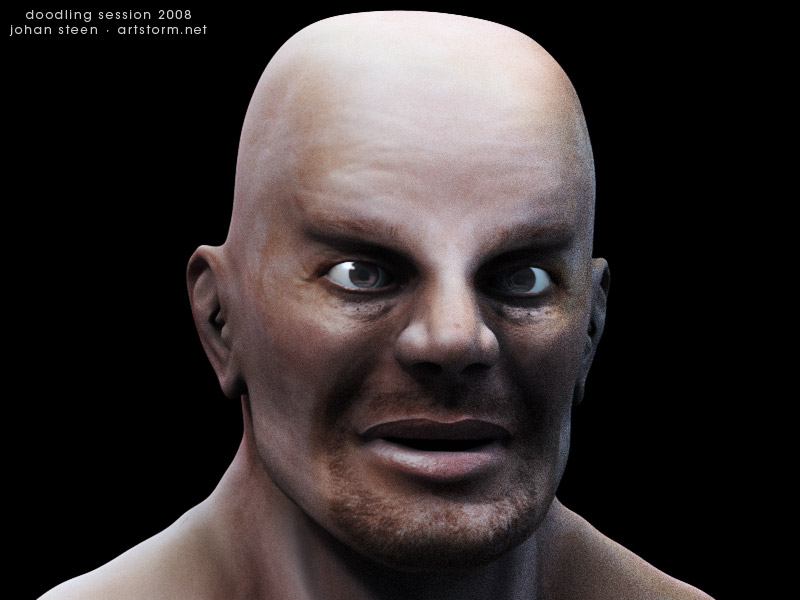
This is approximately a 4 hour sculpt from the first drawn ZSphere in ZBrush until the final textured render in LightWave 3D, as seen below. Let’s call it a small Sunday evening project.
Click to enlarge
Of course, it’s far from perfect, but with the small amount of time spent, I’m pretty happy with it. I could tweak it for a few more hours to make it shine a bit, but that would defeat the purpose of my speed modeling/sculpting/texturing/rendering sessions.
I started this time as well by placing a few ZSpheres and then converted them to an adaptive skin, ie. a polygon mesh. I tweaked the low poly mesh to get the proportions somewhat how I wanted them, and then just kept going by subdividing, detailing, subdividing, detailing and so on, until I had reached about 2 million polygons. I didn’t use any references but just kept going and let the character evolve by itself as I went along and the details started to come through.
A few screenshots from the different stages of my sculpting can be seen in the image below.

The progress in ZBrush, from ZSpheres to detailed sculpt
I spent around 2 hour in total with the sculpting part of the character. At this stage, I would have retopologized the mesh if it was a real project, so I could animate it properly, but as this wasn’t the case I exported the low poly version to LightWave together with a displacement map.
Below is an ambient occlusion render of just the mesh with the displacement map in LightWave.

Male Head - Speed Sculpting - Ambient Occlusion Render
Well, well, then I spent around 2 more hours, painting/creating the color map, specular map and the bump map in ZBrush and Photoshop, as well as setting up the shaders and lighting in LightWave for rendering, which ended up as the image at the top of this post.
I’m getting closer to move on to bigger things, but I’ll probably make an additional doodle or two in the coming week.
Working Music: Joan as Police Woman – To Survive
Hey, man i think your work technically is just superb!
the time u do this in is just impossible. congratulations! i think your pipeline is just beyond perfect and u dont need to improve there nothing,
there is one think though, in my mind that you should look in to.
And that would be anatomy.
best,
m.
Hi,
Thanks, I’ve spend quite some time finding a fast and solid workflow which I’m starting to feel comfortable with.
And yes, you’re right, I’ve not put enough effort into my anatomy studies yet. I’ll definitely devote some more time towards the artistic aspects in my coming posts, which I hope will show some improvements in the explorations of the human anatomy. Thanks for taking the time browsing my progress and your comment. Much appreciated. :)
Oh, and I just checked out your blog, much interesting, and tons of information. I’ll have to take some time and read everything you have posted carefully.
Take care,
Johan
chi chi thank you, and i promise to keep an eye on your anatomic progress :) keep up yor super quality of work!
best,
m.