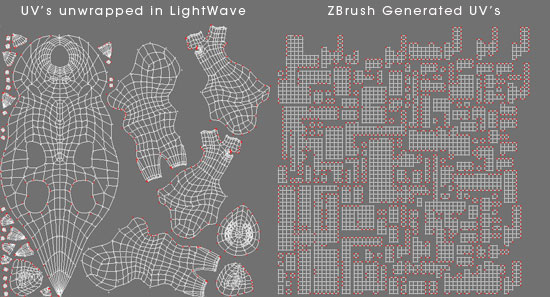
When I was halfway through the sculpting phase I decided to improve my UV Layout for my darling. Originally I had settled on letting ZBrush create the UV map for me, using GUV tiles.
But then I thought Nah, they don’t look very pretty. ZBrush GUV tiles does create a very nice distortion free UV Map, so it’s technically a very good UV Map, but not very easy on the human eye if you want to take the UV Canvas into Photoshop for further editing after you have left ZBrush.
So I went back to my base mesh in LightWave and had a proper UV unwrap session with it instead.

The unwrapped UV layout for the Destrachan
As can be seen, my unwrapped UV Map is so much easier to paint on than the abstract ZBrush generated map if I decide to paint or do other work on the maps down the road. To create my UV Maps in LightWave I use a very nice free plugin called PLG UV Tools which just rocks for UV creation.
I have always thought of creating UV Maps as the most boring and uncreative part of the 3D process, but the PLG Tools has completely changed that for me. It just gives me great UV Maps in no time so I can concentrate on the more creative parts.
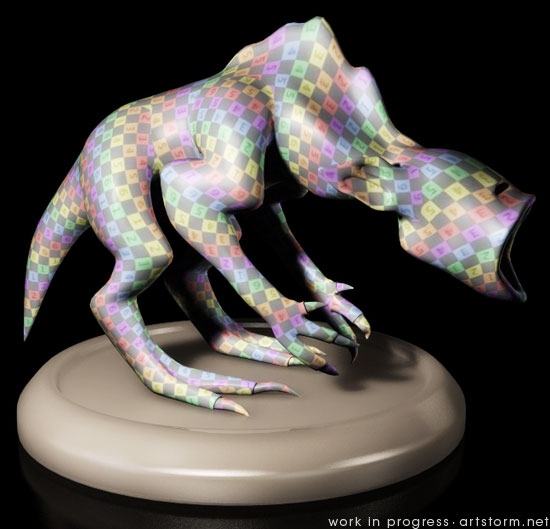
In less than no time I had decided on where my seams and cuts shall be and generated a more or less distortion free UV map out of it. Then run the Relax UV command and follow up with the Pack UV Chart to get as effective placement in the UV space as possible. Here is the base mesh with an UV Checker pattern applied after I had finished my new UV Layout.

Look Ma, almost no stretching!
Gotta love how easy it is to swap out an UV Map in ZBrush for a new one in the middle of a sculpting session.
Anyway, the checker render above is the last render of the base mesh. Now there is only the fun parts left, sculpted and painted versions of this guy!
I have an UV Layout that I am very pleased with. And the sculpting is almost finished. I’ll continue sculpting in the finer details tonight and shortly be back with some images of the final sculpture so I can move on to the painting phase.
Working Music: Camera Obscura – Let’s Get Out Of This Country
