I ran into a weird problem today when I was creating a new topology for a character in ZBrush.
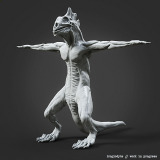
I had roughly blocked out a sculpt, the image to the right, from a ZSphere armature to get the proportions and overall shapes for the character I was working on in place. I came to the point were I started to feel that the geometry was getting in the way in some areas. In other words some areas had too little geometry while others too much.
At this stage I usually take a few minutes, before adding details and polish, to make a quick retopo to even out the geometry and get back better control in the sparse areas without having to bump the subdivision another level (Oh, how I long for ZBrush 4 R2, where you supposedly won’t have to consider this anymore, looks like they have added Sculptris technology).
I find ZBrush’ retopology tools quite intuitive and quick to work with and I have never shared the view that they should be cumbersome. I have a workflow where I paint the new topology I want on the mesh and then just lay out the new topology on top of that. Which have worked out fine for me in the past. Today I ran into something weird though.
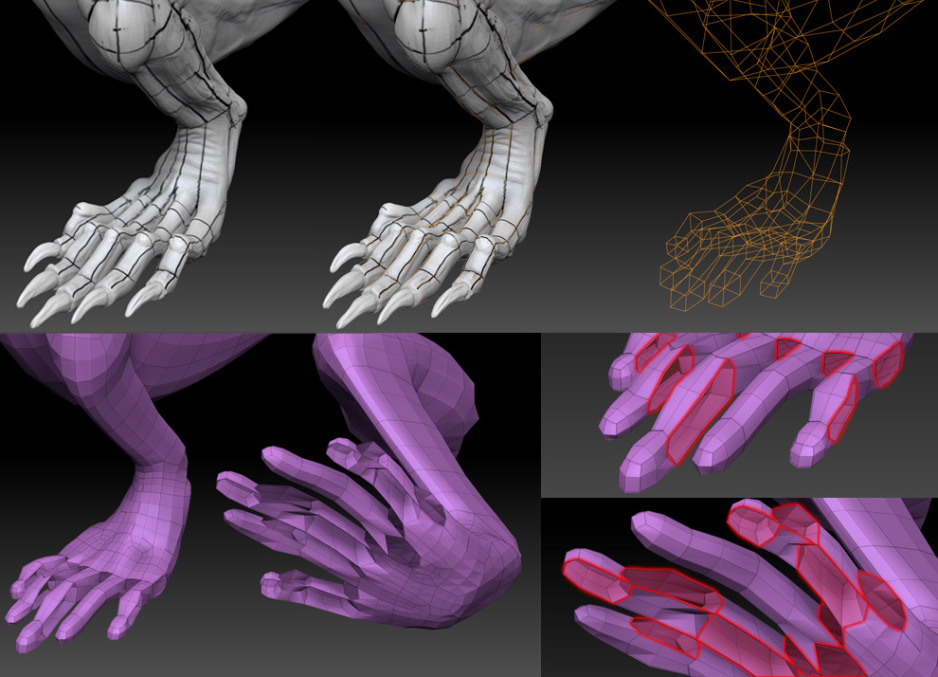
I’ve tried to illustrate what happens in the image below. First we have the sculpture where I have painted a few lines to help me lay down the new topology. Then we have the sculpture with the new topology on top of it, and then just a shot of the topology lines without the sculpture in the background. The second row of images is the result when creating a new adaptive skin from the topology. The holes are highlighted in red in the last two images.
The only part of this character that displays this problem is the foot, the rest of the skin works fine as usual. After having tried to figure out what was going on I simply erased the entire new topology on the foot and created it again. But still no go, I got the same holes the second time as I got the first time. Now I was frustrated, I truly hate it when I have to spend time fighting the software. Here is a turntable video to easier see the holes in question.
As I mentioned earlier, I’m one of those who actually don’t think that ZBrush own topology tools are that bad. I usually get the work done quite fast with them. But this time I’ve to declare myself defeated.
I guess ZBrush has a problem with all the ins and outs with the long, bony, claw like toes that somehow confuses the logic of how the skin is connected on this particular part. That’s my only guess of what’s going on, and I can kind of see where the engine could see two possible choices of where to cap the polygons. It looks like polygons have been created in some cases, but between the wrong edges. The thing is that I have created topology for similar parts in the past and it have worked fine. That was in ZBrush 3.x though, and the topology tools changed in ZBrush 4, so perhaps something changed along the way that causes trouble in this case. It could also be user error, but after having spent too much time with this I am starting to doubt that.
Anyway, I made a quick and easy workaround. I used GoZ to send the skin to modo, fixed the holes, and sent it back. And voila, everything works. I still get obsessed trying to understand why and how this occurs, as then it’s easier to avoid/work around in the future, without having to bounce to modo.
If anyone have any clue or knows more of how and when these holes appear I’d love to get enlightened. I kept searching ZBrushCentral for answers but no luck there either. I found the question, I found other workarounds, but no explanations.
Perhaps I should consider getting Topogun for my topology needs? I see people raving about it all the time. I’m not that keen to add new applications to my pipeline unless absolutely necessary or unless it adds a tremendous boost to my workflow. Topogun might fit into the latter alternative, speeding up my work. And it seems to be straightforward enough to get up and running without a long learning curve.


you need to remake that area, sometimes going point to point with retopo zbrush flips the normals or just plain get’s it wrong, i’ve had this a couple of times where i either took it over to max via goz or export obj and fixed up the area in question or just rebuilt that area again…could be that zbrush laid 2 point on top of one another…just a glitch.
Hey Steve,
Thanks for the input. I’ve come to the same, glitch conclusion, like you as well by now. And at the moment I’m like a child with a short attention span that have forgotten all about this problem and are drooling for the DynaMesh update instead. :) Fortunately, GoZ kind of makes problems like this “a no-problem” more or less anyway.
I tried the Topogun demo after I’d posted and it worked very well, was fast, and gave some more flexibility and freedom than ZB. So I’m thinking of picking up a license, but I’ll see if ZB4R2 has any new/improved topology features in store first.
Cheers,
Johan
This is a common problem for some reason when making a retopo of areas containing fingers, toes and similar geometry. I have experienced this quite a bit and found a solution in every case I’ve tried.
Here is an example:
Say I am retopo-ing a hand. I retopo down the arm to the wrist then up the hand and up to the fingers. This will create the problem. To avoid the problem I retopo down the arm to the wrist and stop. Then I move to doing each finger starting at the tip and move to it’s base. Do each finger this way. tip to base. Then fill in in between the wrist and the fingers. I have never had a problem when using retopo this way.
I have spent many hours looking for a solution, and this is the only one that I have found. I had the problem occur on several models and confirmed that this fixed all of them. Zbrush’s retopo is very buggy, but I still like it. GOOD LUCK to all those reading this who are looking for a fix.
Mike,
Awesome! Many thanks for your comment and tip! I’ll definitely try out your method on my next character!
Cheers,
Johan
Actually this happens because you have done just 4 sided fingers, that’s not enough polys for zbrush to calculate with the topology tools, any time you have to do fingers or other long thin objects make sure it has more than 4 sides.
Cheers
As stated above, added one more side to the fingers fixes it. God, this annoyed me so much. Gotta meet the assignment poly counts. Zbrush, you are so not helping -.-
Yup you guys nailed it. Seems ZB cant do boxes. I am retopoing a feather and usually use max for retopo but thought I would check out the 4R5 tools. You saved me some head banging :)
Cheers
I ran in the same issue. What I did was export the mesh clean it up in an external program and reimport it back in zbrush. After that I subdivided it once and used it on a Zsphere as the topology. From that point it works and afterward you can reconstruct the subd to the lowest again. Its a bit of a workaround but it works.